The kitchen remodel actually started a few weeks ago when we bought the first appliance, a 36-inch Kenmore hood. We drug that monster home and put it in the basement in mid-May. A week later, I got the bug and set to. It was simple, all I had to do was remove the 50-year old existing Kitchen Aire hood (including disconnecting the electrical, which always makes my wife a bit nervous), take the bottom out of the cupboard above, cut four inches off the bottom of the cupboard without wrecking anything else, replace the bottom of the cupboard, install the new hood including hooking up the electrical (which always makes my wife a bit nervous) and, as I so like to say, voila.
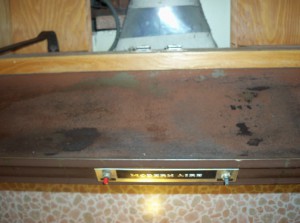
Modern Aire. To its credit it lasted nearly 50 years. Had a scum on it even I couldn't get off and I hate scum. I tried Acetone, and it would have required so much I just let it go.
Fueled by my favorite Lapsang Soochong tea stiffened with 3 heaping spoonfuls of brown sugar, I began. I took one look at the scummy old hood and went to the garage to get latex gloves. Then, overcoming my repugnance, pulled the filter for the last time. I removed the three mismatched screws driven through the sheet metal into the bottom of the cupboard that had held the hood in place for half a century, swung it down and rested it on a Pull-Ups box, facing towards the door. I then ran back and forth between the breaker box and kitchen pulling breakers until I got the correct one. The wiring was dead simple and in a moment I was hauling the old hood out the door to the neighboring apartment’s dumpster. So long!
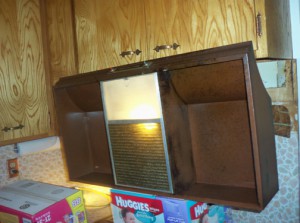
Conveniently set up so I can figure out which breaker to pull. Its last act was to assist in its own demise, like a robot being ordered to walk into a giant metal grinder. Well, that's a little far fetched, but you get the point.
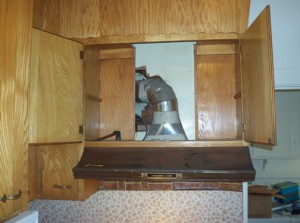
I knew this would be a toxic site. The vent connection was a half assed job, not really sealed and it leads into a vent that looks like it had a Franklin stove attached to it originally. I saw this vent from the other side when I did the wall-furnace-into-bookshelf.
I knocked out the front frame piece carefully so I could reuse it and barely damaged the side pieces in the process. Then, out came the shelf and floor of the cupboard followed by the old vent pipe. Taking apart things in this house is always easy as anything not original is more or less wedged in place. I’ll be surprised if the counter has more than two nails holding it on.
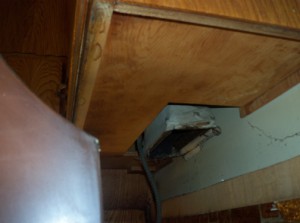
As usual when I come across stuff behind walls in this house, Mickey Moused, not really doing its job, borderline dangerous.
The main furnace we replaced two years ago was hanging on to one rusty wood screw. The furnace guys thought that was funny. I was glad to see it wasn’t held on by a coat hanger. Anyway, back to the vent. I pulled the wooden covering around the vent pipe off and saved it for future use. The vent pipe fell away from the ancient vertical pipe at a touch. When I put it back together it was fastened in just a tad better.
Then came the irreversible part, cutting off the bottom of the cupboard with a jig saw.
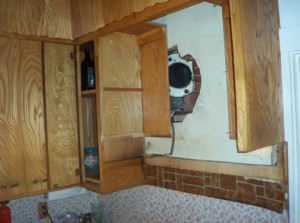
It's a portal to another universe. I must get the hole covered before midnight or a horde of ...bad..things..will come out and eat my Triscuits.
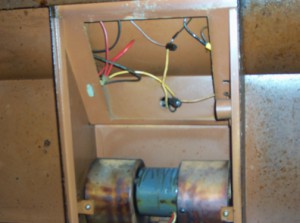
This thing must have cost $2 to build in 1963. Note the wiring is back to white and white to black. The fan did suck air so whatever.
I hauled the new hood up from the basement and that trip told me I had to strengthen the mounting considerably from the 25-lb Modern Aire configuration. The new one weighs like 50 lbs. After figuring out how I wanted everything to go together, I measured about a thousand times and gripped my jigsaw. I probably could have lightly nailed a fence along the cut line since we are painting, anyway, but I just lined ‘er up and let ‘er rip. Got it pretty straight—straight enough to cover with a thin piece of trim, anyway. Next, strengthening the mounting site.
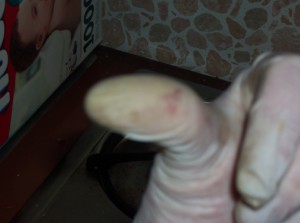
Yes. I stabbed my thumb and it bled into the powder on the inside of my glove. Anyone know if that glove powder is toxic or sterile or anything? Made from ground up styrofoam, probably. Alexandra gets top honors tfor the day with the ear-spark.
The easiest way to strengthen the cabinet was to bolt 2x4s on the inside, which spread out the weight, but are incredibly ugly. I will repair the ugliness when we paint. I used big old wood screws countersunk so I can patch and paint over them. Somewhere along the day, I went to Home Depot and got a 2×4-foot section of ¾ plywood from which I now cut a new cupboard floor, and trimmed out the hole for the exhaust vent pipe. I used big wood screws to fasten the new floor to the 2×4 ends and put the hood on a makeshift jig of two diaper boxes which I could turn to get slightly higher and lower heights. After hoisting the hood into place about 30 score times to check the fit, I finally pulled the wires through the back port into the connection box and we got ready to swing the whole unit into place for the last time. As we maneuvered it around, someone finally got shocked.
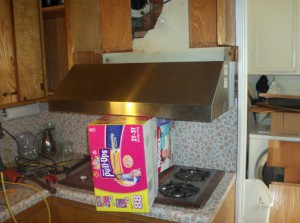
In place for final calculations, incantations and imprecations. Things are going way better than I had any reason to hope. I did have to be careful not to leave the boxes on the stove too long. Not only would that be a fire hazard under normal circumstances, but the surface over the pilot light between the two back burners actually gets hot. No fires though! Disaster averted!
It was dark, by now. Near 9 o’clock at night, and I had been at it 12 hours. I had switched the breaker back on so we would have light. The wires were clipped off in the insulation, so only the tiniest surface of copper was exposed, but that was enough when the ends brushed against the metal back plate and shot a spark into Alexandra’s ear. We were in the midst of heaving it into place and there was nothing to be done except a head jerk and a shriek, then we got on with it. Stout fella, that girl.
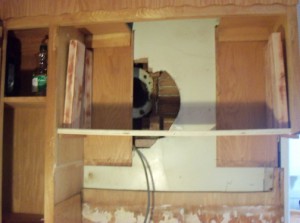
New cupboard floor and 2x4s resting in place before fastening. Worked out perfectly, I have to say. I cleverly used the old shelf mounts to hold the substructure in place while I put the #10 1 1/2 in flat head wood screws in. 3 per 2x4. That hood ain't goin' now wheres.
Twenty minutes later the hood was held in place by six brass wood screws the size of a ten-year-old’s thumb. Full credit to Alexandra for holding that monster in place while I drilled the holes and ran the screws in. That was about it for the job that day. The next day I finished up.
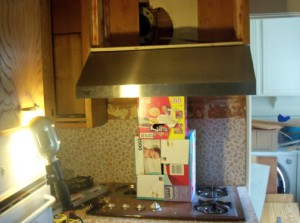
I can't tell you how valuable those diaper boxes were. The allowed me to move the hood around at will, lower, higher, whatever. Very stable.
Sunday morning I got started about 10, mounting the front frame piece, which went very nicely back into place four inches higher than it had been for the last 50 years. Hope it enjoys the improved view. At this point, I realized one end of the hood stuck out farther than the other by ¼ inch. Too far to ignore. Again with Alexandra’s help we dropped it down enough to shift and re-drill holes, so it was square and flush with the cupboard front.
Next, outside to cut down the cupboard doors to their new height. Easy as pie as long as you measure carefully and the router doesn’t get loose and gouge a divot in the edge. All went well and the doors went right in.
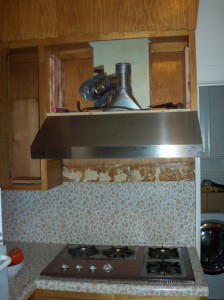
Had to go back to HD to switch from 6 in to 4 in ducts. There was no way to get it to feed into the exit duct after I raised it 4 inches. Taped the crap out of the joints and the flange where it joins the up pipe. Tomorrow I'll add the front trim, cut down and router the cupboard doors to fit, add a piece of brushed aluminum above the backsplash and *that* job will be done.
Things moved quickly, now. I hooked up the electrical, giving myself the second shock of the job when I was rummaging around inside the tiny junction box arranging the incoming wires. I didn’t yell as I have been shocked many times; it was daytime, so I went out and pulled the breaker. The wires coming in were white and black with a bare copper wire coming from the conduit alongside the insulated power wires. I presumed the bare wire was the ground, and must have been right as the house hasn’t burned to the ground, yet. The hood had black, white and green wires, and I knew the green was the ground, so it would have taken an imbecile to screw up the connections.
That said, I should note that in the old one, the connections were reversed—white to black, black to white, so I really wasn’t sure if the whole thing was going to work or start smoking right away. Everyone was at the park so it was a perfect time to test the connections. I stared at the open connection box on the hood for a long moment. Then went out and pulled the breaker. It didn’t immediately pop, so I knew things were probably okay. Still, I was a bit anxious as I rounded the corner , but the hood was just sitting there, not in flames at all, so: success!
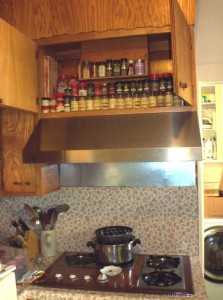
The final step came a week later when I built stepped spice shelves into the cabinet out of the old shelf. Since the cabinet was higher, even though we’re both tall, we couldn’t see more than the first row of spices. Once up on their little step, everything was visible. The next week, after extensive online shopping, we went back to the Sears Outlet for a cooktop to match and got a beaut: five-burner Kenmore that matches the hood at a knocked-down Internet price of about half its retail cost. Two weeks after that, we got a Kohler double basin sink at Home Depot, the only appliance we have paid full price for. Those are in the basement waiting for the new countertops.
For a full photo set with more glib captions, click here.
Follow the whole story of the Great Kitchen Renovation of 2011!
The Kitchen Adventure Begins
One Response to 1. Prequel: Before the Adventure Began: Installing the Hood
Latest News
- Teachers bring new methodologies, in-depth studies and sunshine to classrooms through Vegesna grants
- Feature: Entrepreneurship and Beyond: Skills learned in incubator classes guide startup development and pay off in life
- Harker Communication Office Wins Prestigious Awards
- Harker Quarterly Wins CASE Award of Excellence
- Harker in the News




[…] The Kitchen Adventure Begins Pre-quel: Before the Adventure Began: Installing the Hood […]